Search Results

Showing posts with label wedding. Show all posts

Sunday, April 3, 2011

Corina's Cute Wedding

Last week, Corina emailed me some adorable photos from her DIY wedding. 


She handmade all her centerpieces from branches and paper flowers (just like yours truly)


I love how she used so many bright colors. Everything looks so fresh and festive!


I also love how she used them to decorate her dessert table!


Great job Corina and congrats!!

All photos by Jessie Pyne
(UPDATE: Jessie emailed me with a link - check her out!)

Thursday, September 9, 2010

Couple More Photos

I know you come here for DIY tutorials and cookie recipes, but that's too bad today. 
All I've got for you is photos :). 

Our incredible photographers (Rachael Spiegel and Andrea Jacobson of The Observatory) posted some more of our photos on their blog. There are more detail shots of the DIY stuff coming, but for now enjoy some of their (and our) favorites!


Sunday, August 29, 2010

Welcome to DC!

Welcome bags have become a staple at weddings in the past couple years. And while I usually try to do exactly opposite of whatever's "in" at the time, I really wanted to have welcome bags for all the guests staying at the hotel. 

I started looking for cute gift bags, but anything that wasn't white or tan seemed to be $3 each...and that wasn't going to work. I wish I remembered where I found the link, but when I clicked on it, there was a beacon of gift-bag light.


How perfect! I could screen print them, fill them with goodies, and guests could actually keep and reuse them! Less waste!


I wanted something that was pretty gender neutral (no cherry blossoms) and I didn't want anything with our names, initials, or dates on it. Who wants to use a "Jay and Renee 24/7!" tote at the grocery store?
 
I found this adorable clip art at iStockPhoto and it worked perfectly!

I Gocco'd the image onto each tote using navy blue ink. TIP: I had a little trouble with the ink bleeding through, so I put a magazine inside each tote before I printed the image. I let them dry for 24 hours then, to make sure that it doesn't wash out, I heat set each print with an iron. 


As I've probably mentioned a few times, most of our guests were from out of town and planned to explore DC a little while they were in the area. So not only did we fill the bags with the usual water, gum, advil, and granola bars, we added business cards from a local cab company, DC Metro guides, and vintage Washington DC postcards.

So definitely think about using canvas bags instead of paper. Who knew they were so cheap! Plus the guests were really wowed!

Thursday, August 19, 2010

How Sweet it Is

We ended up making about 3,000 cookies for the big day. 

...Chocolate chip...
...red velvet...
...sugar...
...oatmeal...
...lemon...
...shortbread...

Well, you know, you've been reading the blog.

About a month before the wedding, I realized that if I went to a wedding with that many awesome cookies, I'd want the recipes. 

With a couple clicks of the mouse, several reams of paper, and some baker's twine, I put together these adorable recipe books for guests to take home.


Each book had 25 (I think) recipes in it, covering all our favorites.


I used Paper Source's text weight eco-white paper in 8.5x11. and printed each within a 3 7/8" by 9 1/4" area (to fit the #10 backing, also from Paper Source)

Let's try explaining that again. I used Microsoft Word and set my document to two columns each measuring 3 7/8" by 9 1/4". That way I could print two per sheet and save a little paper. I typed up all my recipes and started printing.

I designed the cover in Adobe Illustrator using clip art, but as always, you don't need any graphic design skills - draw something or collage and get it photocopied, use rubber stamps, download a free template (try i-do-it-yourself.com), or purchase one if you really feel like it's out of your league.

Once everything was printed and cut down to size. I punched two holes at the top (the #10 backing comes with holes ready). 

A little bakers twine threaded through the holes to tie it all together...and ta-da!


The guests LOVED them. People kept coming up to me and saying what a great idea it was and how they were excited to try *insert name of awesome cookie here*.


So give it a try, make it a favor, it's the gift that keeps on giving...provided your guests enjoy baking.


Thursday, July 22, 2010

This weekend!

Bouquet, originally uploaded by UglyKitty.

Can you tell things are getting busy around here? All my staged, nice photos with my fancy camera have been replaced by quick iPhone shots.

Well, it's this weekend!!!!!

Would you believe there is only two things left on my to-do list: manicure/pedicure and pack for the honeymoon...and I've got my nail appointment in 1 hr 15 mins.

After the wedding, I'll take the time to post all the details and lots of tutorials, but for now, there here are the bouquets.


Each one was made from recycled paper (security envelopes), wire, floral tape, tacky glue, and ribbon.

Total cost per bouquet: ~$3

My favorite though is the ribbon-wrapped handle. My maid of honor and I played with them for about an hour trying to figure out how to wrap them to no avail. Then I channeled my inner little girl, and started tying knots in the ribbon friendship-bracelet style. The ribbon held perfectly and it gave the wraps a great staircase effect.


I'll be back in a few weeks....as the Mrs.!

Wednesday, July 14, 2010

Cutest topper ever

What's better than having wedding presents on your doorstep when you arrive home from work?

Having freaking adorable cake toppers lovingly made by your fabulously-creative aunt waiting on your doorstep when you arrive home from work.

That's what.


Also seen on the ilovetocreate blog.

Friday, July 9, 2010

Drink it up!

I know you've seen this idea before, but since I'm insane, I wanted to add another DIY project to our wedding.

We're putting together welcome tote bags for our guests and, since it will be a nice, hot, summer day, we thought it would be a good idea to give them some water (customized of course).


All it took was some leftover belly bands from our invitations and a membership to Sam's Club.


Just recruit a craft-reluctant fiance, have him remove the existing labels, add a little double stick tape, and wrap the belly band around the bottle.


Done!

Then find a place to store tons of water bottles until you've finished screenprinting the tote bags and can convince your fiance that it's his job to stuff them with goodies.


Tuesday, June 8, 2010

Centerpiece of my Heart

I apologize for the crappy iPhone photos, but the wedding stuff is at my parent's house and my camera is at mine. Plus this way it doesn't give too much away.

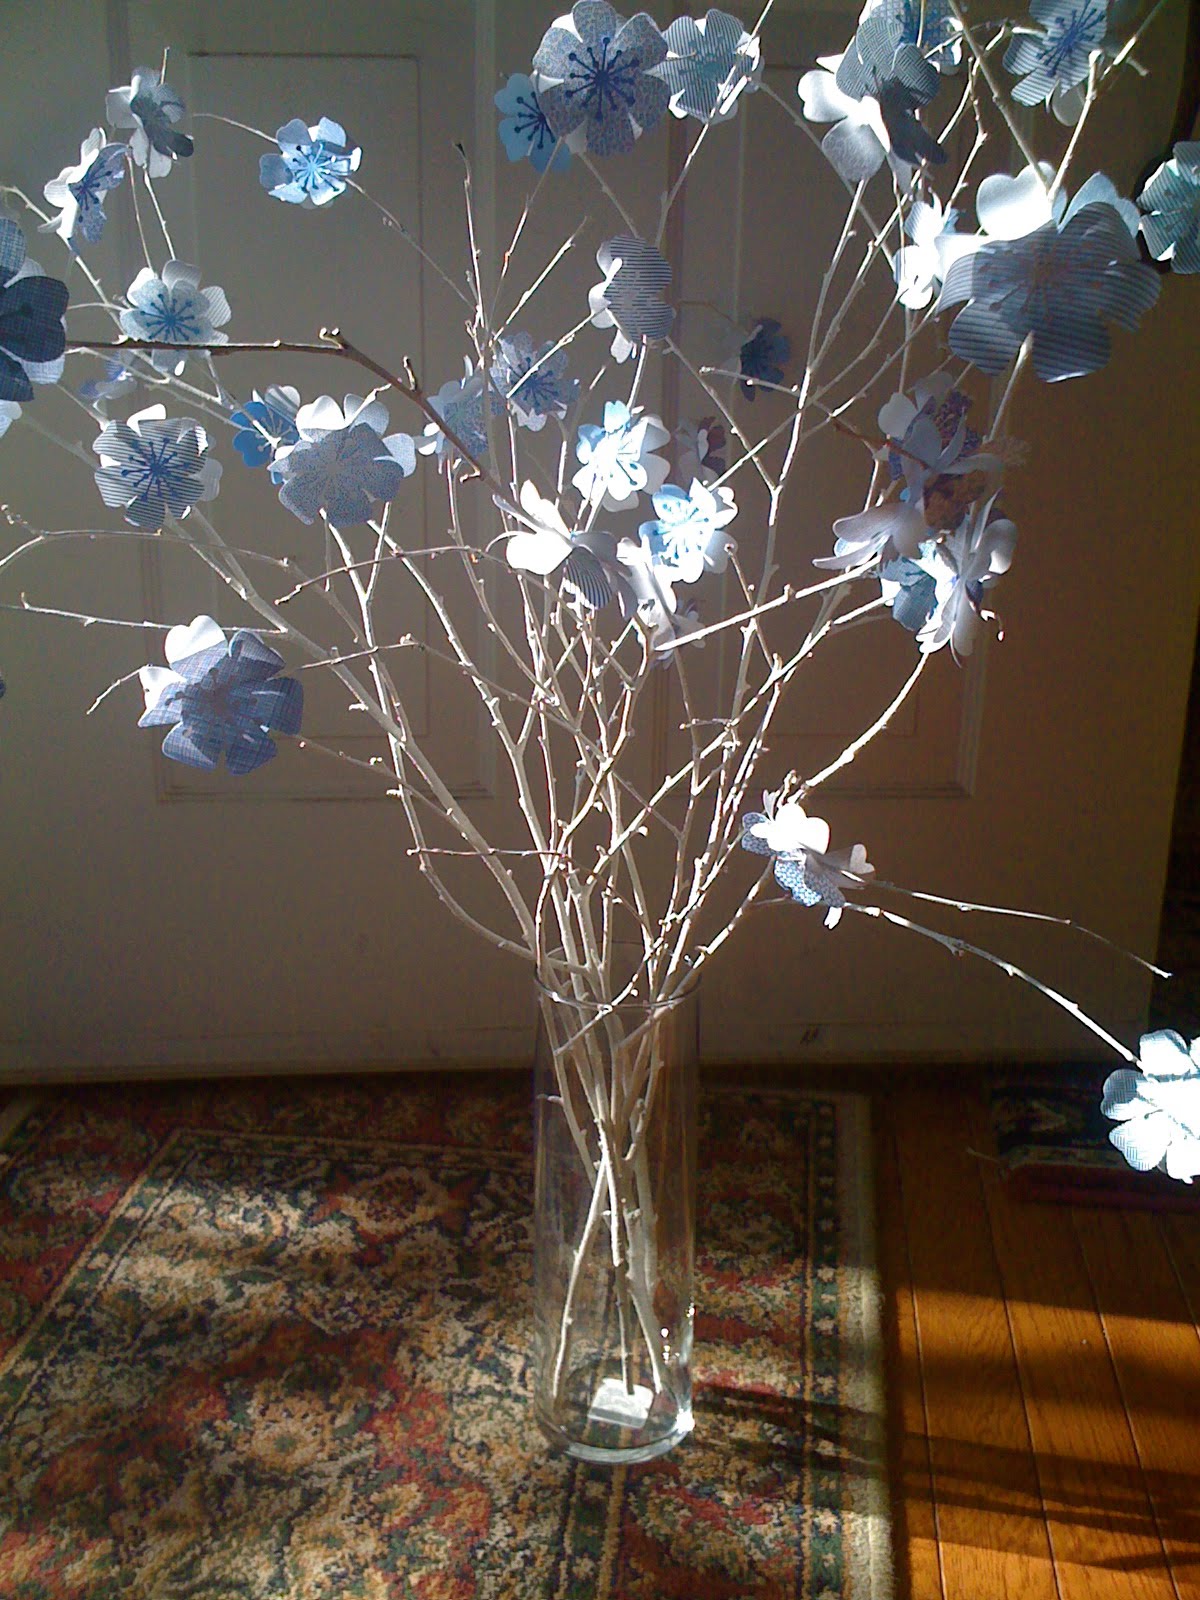
We have officially (and by we, I mean my incredible Mom) started making the centerpieces! We've 1/4 of the way done!


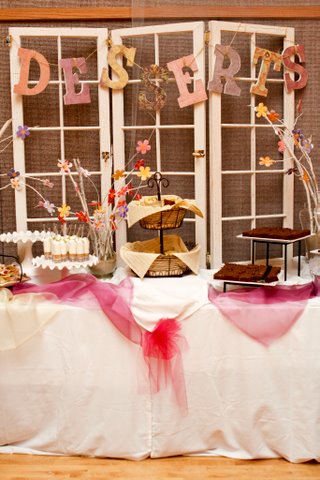
While giant floral arrangements in vases are beautiful, they are way out of my price range. Plus, I'd rather go a greener, DIY route.
So what's the damage?
Total cost per centerpiece: about $4!


How'd we do it?

Flower punch purchased at Michaels: $11.99 (after 40% off coupon)
$11.99/25 vases = $0.50 per vase

Starburst punch purchased at Michaels: $10.79 (after 40% of coupon)
$10.79/25 vases = $0.43 per vase

10" glass cylinder vase (I waited for a sale at Michaels): $2.50 each

Glue sticks: already had, but probably about $0.10 per vase

Paper for flowers: Recycled security envelopes - Free! (unless you count all the bills I had to pay to get the envelopes)

Sticks from out yard - Free!
Paint for sticks - Free! (the previous owner's of our house left a 1-gallon can of white paint)

Rice (to weight the bottom): Estimate of $0.02 per vase.

Another $0.10 thrown in for something I'm sure I forgot.

Total cost per centerpiece: $3.65!


All you need is the above materials, lots of time, and a slight mental disorder that forces you to handmake everything under the sun.

Directions

1. Punch flowers using the large flower punch.

2. Punch flower centers using the starburst punch.

3. Using a butter knife, bone folder, or finger, gently curl the edges of the flowers.

4. Glue the starburst to the larger flowers. I used a glue stick.

5. Gather a LOT of branches after storms and let them dry on your front porch.

6. Paint branches with white, latex paint and let dry.

7. Take two flowers, add a little hot glue to the back of one, and pinch a branch between the two flowers. That way you have one on each side of the branch, but only have to glue once.

8. Repeat until you have enough to cover all your tables!


Thursday, May 27, 2010

Love is in the Air

Since picking our ceremony location, I've been struggling with how to decorate it. I thought about large signs, but couldn't figure out the logistics (we're responsible for putting up and taking down the decorations in our alloted time slot). And I'm not into large flower displays.

So, I'm once again torn between revealing too much and sharing my (fabulous!) ideas.
Luckily, I can't actually show this final product, I can only give you a glimpse into my plan. You'll understand in a second.

I guess I should also clarify that this wasn't really my idea. You ever see something at a glance, get a great idea, look at the item again later - more closely, only to discover that that idea you just came up with is actually what the original item was? Well, that happens to me all the time.

In this case, I caught a quick look at one of oh joy!'s posts from April, thought "OMG, that would be perfect for the ceremony." And, yes, I actually thought the letters O. M. and G. Sad, I know.

So today, when I decided to put this post together, I go back to the post only to see that she's categorized it in "here comes the bride."

Oh well, it's still awesome even if I didn't quite come up with it first.

So what's this great idea? What's cheap, eye catching, creative, easy to put up, easy to take down, can be used at the reception, and during photos? Well it was oh Joy!'s post on Louis Vuitton's new window display:


O.M.G. Balloons!!

Why didn't I think of that!

I've already ordered "L" "O" "V" and "E" in giant 40-inch silver mylar balloons!

I figure with the bride, the groom, the officiant, 4 bridesmaids, 4 groomsmen, a maid of honor, a best man, ring bearer (cooperation permitting), flower girl (cooperation permitting) the groom's parents, and bride's parents, all standing up there, we don't need much else.

I've got ideas for these at the reception too!
;)

Monday, May 24, 2010

And they're off!

It's official,
no turning back now,
no more spell checking,
no more fact checking...

the invitations are sent!
Makes me a little nauseous to be honest.


I have to say, I really love how they came out.
(you'll have to click on it for the full size)
(and I'll take photos when I'm home during daylight again)

If you see a typo - other than the one on the small info card, I caught that one - don't let me know.


As for the boring technical info: I designed it in Adobe Illustrator with purchased clip art. Used my laser printer and printed on Paper Source cardstock (eco white, bluebell, and navy). Then I used this trick to hand-addresses the envelopes.


The stamps are my favorite part though!


I spent a couple weeks (ok, maybe months) searching ebay for american, off-paper, unused, blue, stamps and bought up everything I could find. For the record, the older the stamp, the worst it tastes. I'm very happy the USPS decided to make self-adhesive stamps.

It was so hard saying goodbye to my precious invitations. It makes everything so real. Not in the sense that I'm scared to get married, but what if I put the wrong time? or date? or is says "Remee"? what if the automatic letter sorting machine eats my entire set for brunch? or the hotel phone number is wrong and it turns out to be an adult entertainment number instead?

(that last one actually happened to my friend - luckily they have a good sense of humor)

Well, at least I was able to take care of hungry letter sorting beast fear. The nice people at the USPS let me hand-cancel each one. So they wouldn't have to force fed through the sorter.

They went out Thursday and we even got our first RSVP back today!

So exciting!!

Friday, April 23, 2010

Just In Case

Some people may call it “anal retentive,” but I call it “always prepared.”
The boy scouts would be proud.

On the big day, I plan to have my clear nail polish, my mini static guard, breath mints, sewing kit, Tide-to-go pen, oil blotting papers, tissues, nail file, Band-aids, hair clips, hair spray, umbrella, spare pair of shoes, snacks, Advil, inflatable life raft, and King Kong (you know, in case of Godzilla).

So I’ve been searching for a small vintage clutch that will hold all of my life-saving supplies...

similar to this one:

…but everything seems to be coming up short (pun intended).

Until last night, when Etsy’s front page appeared on my laptop in all its, beautiful, “you-should-buy-that” glory. And I saw this…


(photo credit: HeidiCreations)

Isn’t it gorgeous!
And perfect!

(photo credit: HeidiCreations)

Ivory outside, blue inside, and large enough for all my crap…well most of it.

(photo credit: HeidiCreations)

Well, maybe it will be sunny and I won’t need an umbrella :)

Tuesday, April 20, 2010

Having my Cake and Eating it too!

Over the weekend, the boy and I went to the bakery to have cake for breakfast, I mean, taste cake for the wedding.

We enjoyed orange cake
and chocolate cake
and lemon cake
and vanilla cake
and yellow cake
and double-chocolate fudge cake
and buttercream frosting
and white chocolate mousse
and chocolate frosting
and some more orange cake
and raspberry filling
and lemon cake
and diet pepsi!

And after the sugar coma set in...we set out to paint our house.
Word of advice, if you need to paint a house, don't have cake and diet pepsi for breakfast.

Anyway, here's the cake!


Ok, so for the first time ever (I swear) I forgot to bring paper to a meeting. So being someone who needs to see things to understand, I grabbed the nearest napkin and sketched out the design we decided on.

You can picture it perfectly, right?

How about in ivory, with ivory piping, and monochromatic blue ribbons and a monogram? Got it? Great!

and with this on top... :)

Wednesday, April 7, 2010

You Guest it!

I figured out my guest book conundrum!
Did you know I had a guest book conundrum?
How do you spell "conundrum"?

Well, I LOVED the idea of a tree with finger prints


...but people may not be willing to dirty their gussied-up fingers.

So I paced and thought and thought some more...
and flipped through photos
...and searched blogs
but nothing seemed to appeal to me as much as the tree guest book.

Until I stumbled on this photo from Made by BeaG

(photo credit Made by BeaG)

Then it hit me!
(duh!)

Cut out a bunch of leaves, add a little double-stick tape square on back.
Then let people write messages on the leaves and stick them onto a large tree print.

The idea is just forming, but once I actually have something made, I'll post a follow-up.
Yea!

Saturday, March 20, 2010

Gettin' Hitched

Another week of business trips means another week without a post...so sad.
Until I can get back in the kitchen, enjoy my country-themed guest post on WedLoft!

(photo credit Once Wed)


Friday, March 12, 2010

Guest Blog - The Everyday Bridesmaid

You all know how much I love the topic of bridesmaid dresses.
So here's one more (and not just in blue this time)!

Check out my guest post on the WedLoft by Wedding Window blog!

(Original photo credit unknown, but found on Offbeat Bride)

Monday, March 8, 2010

Drink it up!

I know that I say this everytime...
but I'm really excited about my newest project.
Although, I use the term "project" loosely.

How cute is this?

According to our reception site coordinator we'll need a couple bars to cover the number of guests (I never thought that I had a large family until I started counting :))

And what makes bars fun?

Liquor!
I mean, vintage paper straws in a dispenser!

Add a little bakers twine and some security envelope hearts and my "project" was complete!


Directions:

1. Purchase one acrylic straw holder from Bed Bath and Beyond.

2. Purchase paper straws from HeyYoYo on Etsy.

3. Punch 4 (two of each pattern) hearts out of security envelopes using a heart-shaped paper punch (I think it's Martha Stewart brand).

4. Cut bakers twine to desired length.

5. Using a glue stick, glue two matching hearts together, sandwiching the end of the bakers twine between them.

6. Repeat with other hearts.

7. Tie around straw holder, securing with a tiny drop of Elmer's glue at the knot - if you use a tiny dot, at the knot, in a glue that dries clear, no one will ever see it and it will keep the string from falling down.

8. Place on bar and let guests enjoy their drinks!


Tuesday, February 23, 2010

Everything's Going to be Alright!

I must confess.

Although I really love my ideas and am thoroughly committed to my "every shade of blue" theme, I've started to get a little nervous.

What if they clash?
What if no one gets it?
What if my vendors go color blind and think that periwinkle, aqua, indigo, and Pantone 662 C are all the same?
What if Papa Smurf sees the wedding photos and emails me regarding decorations for Smurfette's Super Sweet Sixteen?

Well, I'm taking a deep breath and enjoying this post from Style Me Pretty.


Elizabeth and Peter put together a gorgeous wedding using everything from light blue to cornflower, to royal blue to navy. And each element flows from one to the next with no clashing. Even the blue sky blended in perfectly!

I particularly love the table and banner combination.


The best part...no smurfs in site!
Blog Widget by LinkWithin

ShareThis