Search Results

Showing posts with label decorations. Show all posts

Sunday, April 3, 2011

Corina's Cute Wedding

Last week, Corina emailed me some adorable photos from her DIY wedding. 


She handmade all her centerpieces from branches and paper flowers (just like yours truly)


I love how she used so many bright colors. Everything looks so fresh and festive!


I also love how she used them to decorate her dessert table!


Great job Corina and congrats!!

All photos by Jessie Pyne
(UPDATE: Jessie emailed me with a link - check her out!)

Thursday, February 17, 2011

Cookie Stands in Action

Thanks to a little D*Sponge linkage, my DIY cookie stands are probably the most popular of my posts. So how did they turn out?

Adorable...if I do say so myself.


We also screen printed bags so people could load up on the 1,200 cookies my mom, my mother-in-law, and I made.


My cousin, taking her share.

To make the bags, I bought these (p.s. Uline is my secret weapon, they have everything) and Gocco'd a monogram that I designed in Illustrator. A round computer-printed label would work just as well if you don't want to screen print them.

And here's the cookie stand tutorial, if you missed it.


Some cookies never made it into the bags.


But a few did. :)


The reception hall was amazing, we dropped everything of a couple days before and they had the whole table set up perfectly when we arrived.


Mmmm...oreo cookie cookies.
OK so I just went to grab a link and apparently, I haven't posted this recipe yet. I'll have to get on that.


There's no real recipe for these PB cup cookies, just a couple steps: 

1. Scoop store-bought peanut butter cookie dough into a greased mini muffin tin. 
2. Bake as directed 
3. As soon as they come out of the oven, stick a mini reeses cup in the middle.
4. Curse the day that PB first met chocolate and put on your "buffet pants."


I don't even know what these are.
They might be PB-O-Cocos, but they look rounder. 
Whatever, they were gone by 10:00 anyway.


The boy loves pinwheels.
These are from that Cookie Companion book over there on the right ---------->;
(scroll up a little bit)
Not enough decadence for my taste though.
But what can you do? I'm married to him now :)

All photos by The Observatory

Tuesday, February 8, 2011

Please be Seated

While I can't remember where I came across the idea, the moment I saw someone use years for table numbers, I knew I was done searching. 


We scoured through boxes and photo albums and frames and so on for the best photos of us from each year. It was so much fun picking out who would sit at which year.


Our parents, of course, got the early years (when we were cutest) and our friends got "the awkward years." Although, thoughtfully, our photographers didn't take any "awkward years" photos. Which is probably a good thing since no one wants more of those photos floating around.

Well, maybe one embarrassing photo slipped in there...


And, of course, everything was handmade.

I spent a couple months collecting frames from Goodwill stores near my house and spray painted them white. 

Each photo was scanned, resized, printed and cut to the appropriate size. I also printed and cut out each year.

I then mounted them to scrapbook paper and put them in the frame.

I would say it cost about $6 per table number.

Then we had to think about the seating chart. It seemed perfectly logical to me that since we were doing years, a timeline would be the perfect display option.


We ended up having three timeline boards set up on easels in the reception lobby where people could find their names and take their seats.


To make the boards, I purchased three 3/4-inch form board from the craft store and covered it with fabric using double-stick tape and flat tacks on the back.  

I then took blue ribbon and ran it across the center, fastening on back with double-stick tape and flat tacks.

The years were again printed out on my computer, cut out, and taped to the ribbon with more double-stick tape.

I used permanent marker to draw lines up and down from each year, making sure everything was evenly spaced, and that there was enough room to display all the names.

Each name card/banner was printed on my home computer, cut out, and tacked to the board using blue and white round tacks.  

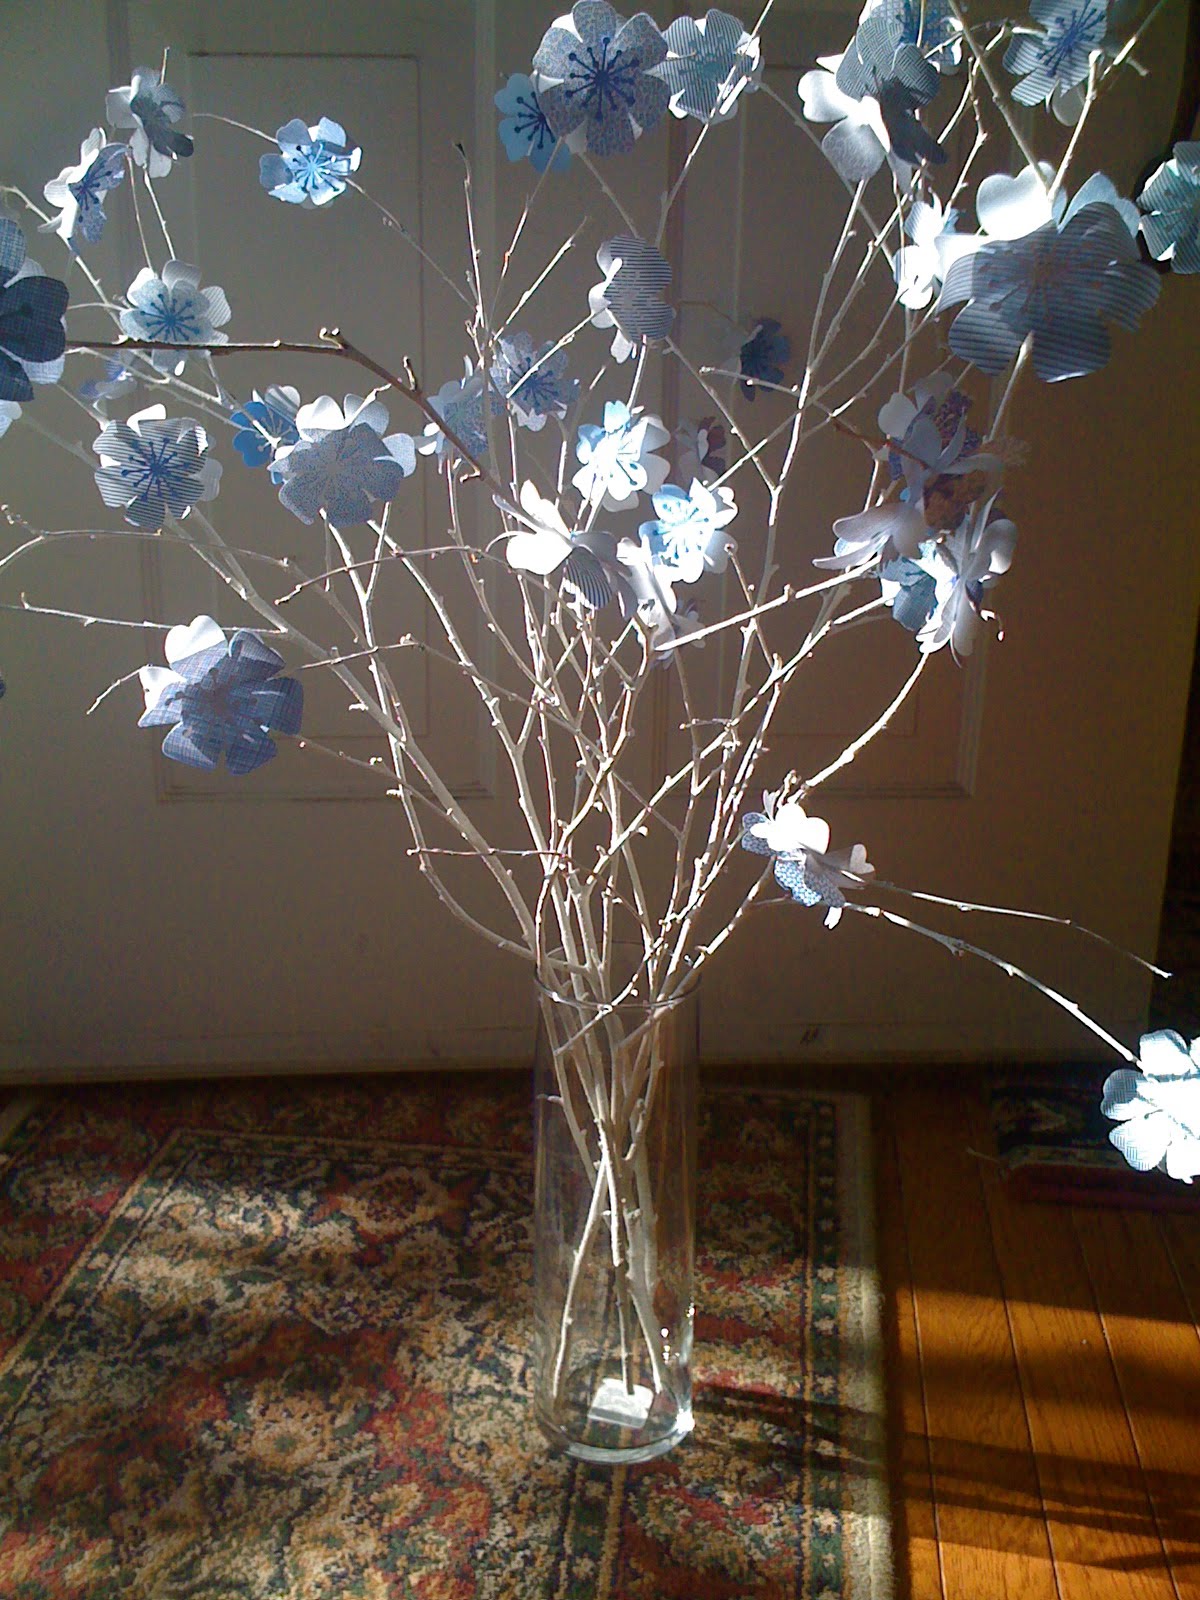
I also added some extra paper flowers from the centerpieces to fill in a few gaps.

It's hard to say how much the seating chart cost because I had the fabric and ribbon, but I know I picked both up on clearance. So maybe $5 for the fabric, $1 for the ribbon, $3 for the tacks and tape...so maybe $10 for all three? 


We also needed a way to let the waiters know who ordered what.


So we added Paper Source menu stamps to the back of each banner as well as a reminder of the table number. 

I bet you can guess who the two people having steak at Table 2010 were. :)


Saturday, January 29, 2011

Our Wedding Tree

One of the things I had the hardest time trying to figure out was the guestbook. It wasn't that I didn't have any ideas... it's that I had too many. We eventually decided to go with a wedding tree.

(photo credit Jonas Peterson)

But I didn't think people would want to dirty-up their fingers, so I had another idea!

(photo credit The Observatory)


We made a poster, cut out a bunch of leaves, and asked people to "leaf" us a note! 


(photo credit The Observatory)

It was a big hit!

(photo credit The Observatory)

And now it's framed in our living room.


So how'd we do it?
Pretty simple really.

I purchased some clip art from istockphoto.com
Created a 24"-36"-sized document in Adobe Illustrator and added some text.
(fonts used: BlairMdITC TT Medium and Burgess Script)
Took the file to Staples and had it printed on a poster.
(I think it was about $25)

Then I picked up a pack of cardstock in various shades of blue and cut out leaves. No pattern, just freehand. I added a small piece of double-stick tape to the back of each. I made sure to use those little scrapbook tape squares so that the tape wouldn't be exposed, but would have a little tab of paper that guests could pull off when they were ready to add their leaf to the poster.

The venue had an easel and put the poster up outside the reception hall and set up a table with the leaves and various blue markers.

And all our guests started writing sweet notes!


See the big "I love you"? That's from my husband's cousin (aka the little boy in the photo above). Too cute!

However, the best one is from Jay's Grandma/our friend "Kennedy." 
I guess that, because his signature was so light, she didn't see it.


Bless your heart, Grandma. :)

Tuesday, August 24, 2010

L O V E!

As in, I LOVE this photo!

As in, I seriously had to stop and catch my breath when I saw this photo.


Our incredible photograhers posted a couple "sneak peak" photos on Facebook and I, of course, had to share. Plus, it's a great example of our balloons in action.

Make sure you check out every website they have - and make sure you hire them for your wedding!

Thursday, July 22, 2010

This weekend!

Bouquet, originally uploaded by UglyKitty.

Can you tell things are getting busy around here? All my staged, nice photos with my fancy camera have been replaced by quick iPhone shots.

Well, it's this weekend!!!!!

Would you believe there is only two things left on my to-do list: manicure/pedicure and pack for the honeymoon...and I've got my nail appointment in 1 hr 15 mins.

After the wedding, I'll take the time to post all the details and lots of tutorials, but for now, there here are the bouquets.


Each one was made from recycled paper (security envelopes), wire, floral tape, tacky glue, and ribbon.

Total cost per bouquet: ~$3

My favorite though is the ribbon-wrapped handle. My maid of honor and I played with them for about an hour trying to figure out how to wrap them to no avail. Then I channeled my inner little girl, and started tying knots in the ribbon friendship-bracelet style. The ribbon held perfectly and it gave the wraps a great staircase effect.


I'll be back in a few weeks....as the Mrs.!

Wednesday, July 14, 2010

Cutest topper ever

What's better than having wedding presents on your doorstep when you arrive home from work?

Having freaking adorable cake toppers lovingly made by your fabulously-creative aunt waiting on your doorstep when you arrive home from work.

That's what.


Also seen on the ilovetocreate blog.

Tuesday, June 8, 2010

Centerpiece of my Heart

I apologize for the crappy iPhone photos, but the wedding stuff is at my parent's house and my camera is at mine. Plus this way it doesn't give too much away.

We have officially (and by we, I mean my incredible Mom) started making the centerpieces! We've 1/4 of the way done!


While giant floral arrangements in vases are beautiful, they are way out of my price range. Plus, I'd rather go a greener, DIY route.
So what's the damage?
Total cost per centerpiece: about $4!


How'd we do it?

Flower punch purchased at Michaels: $11.99 (after 40% off coupon)
$11.99/25 vases = $0.50 per vase

Starburst punch purchased at Michaels: $10.79 (after 40% of coupon)
$10.79/25 vases = $0.43 per vase

10" glass cylinder vase (I waited for a sale at Michaels): $2.50 each

Glue sticks: already had, but probably about $0.10 per vase

Paper for flowers: Recycled security envelopes - Free! (unless you count all the bills I had to pay to get the envelopes)

Sticks from out yard - Free!
Paint for sticks - Free! (the previous owner's of our house left a 1-gallon can of white paint)

Rice (to weight the bottom): Estimate of $0.02 per vase.

Another $0.10 thrown in for something I'm sure I forgot.

Total cost per centerpiece: $3.65!


All you need is the above materials, lots of time, and a slight mental disorder that forces you to handmake everything under the sun.

Directions

1. Punch flowers using the large flower punch.

2. Punch flower centers using the starburst punch.

3. Using a butter knife, bone folder, or finger, gently curl the edges of the flowers.

4. Glue the starburst to the larger flowers. I used a glue stick.

5. Gather a LOT of branches after storms and let them dry on your front porch.

6. Paint branches with white, latex paint and let dry.

7. Take two flowers, add a little hot glue to the back of one, and pinch a branch between the two flowers. That way you have one on each side of the branch, but only have to glue once.

8. Repeat until you have enough to cover all your tables!


Thursday, May 27, 2010

Love is in the Air

Since picking our ceremony location, I've been struggling with how to decorate it. I thought about large signs, but couldn't figure out the logistics (we're responsible for putting up and taking down the decorations in our alloted time slot). And I'm not into large flower displays.

So, I'm once again torn between revealing too much and sharing my (fabulous!) ideas.
Luckily, I can't actually show this final product, I can only give you a glimpse into my plan. You'll understand in a second.

I guess I should also clarify that this wasn't really my idea. You ever see something at a glance, get a great idea, look at the item again later - more closely, only to discover that that idea you just came up with is actually what the original item was? Well, that happens to me all the time.

In this case, I caught a quick look at one of oh joy!'s posts from April, thought "OMG, that would be perfect for the ceremony." And, yes, I actually thought the letters O. M. and G. Sad, I know.

So today, when I decided to put this post together, I go back to the post only to see that she's categorized it in "here comes the bride."

Oh well, it's still awesome even if I didn't quite come up with it first.

So what's this great idea? What's cheap, eye catching, creative, easy to put up, easy to take down, can be used at the reception, and during photos? Well it was oh Joy!'s post on Louis Vuitton's new window display:


O.M.G. Balloons!!

Why didn't I think of that!

I've already ordered "L" "O" "V" and "E" in giant 40-inch silver mylar balloons!

I figure with the bride, the groom, the officiant, 4 bridesmaids, 4 groomsmen, a maid of honor, a best man, ring bearer (cooperation permitting), flower girl (cooperation permitting) the groom's parents, and bride's parents, all standing up there, we don't need much else.

I've got ideas for these at the reception too!
;)

Wednesday, May 19, 2010

On Cloud 9

Hi everyone! Did you miss me? Well, we're officially moved into the new house...and by "officially moved in" I mean I have a bed (with sheets) and boxes stretched out over the floor as far as the eye can see. I haven't seen my favorite jeans in 4 days.

I'm hoping that explains my long absense. And I hope you're willing to forgive me. But, now that we've moved, wedding planning is moving to the top of my to-do list. So what's next on that list? A ring-bearer plate of course!

A long, long time ago, I saw this fabulous necklace from BlockPartyPress on Etsy.

And, a long time ago, I purchased it at Crafty Bastards!
I love it. I wear it all the time. I get lots of compliments on it. I like compliments. :)


So when I discovered that BlockPartyPress had ventured into making ring dishes. I knew it was meant to be.


While the "Wood you love me" dish is downright adorable, the "Cloud 9" style is more my staple (plus it's blue!)

A couple quick emails later, she agreed to make me a custom ring dish!


I don't have it yet, but I was too excited to wait to post about it! So just picture the ring dish above but in light blue, with little white clouds, and a navy "9".

I'll post some pics when it's done! Yay!

Monday, March 8, 2010

Drink it up!

I know that I say this everytime...
but I'm really excited about my newest project.
Although, I use the term "project" loosely.

How cute is this?

According to our reception site coordinator we'll need a couple bars to cover the number of guests (I never thought that I had a large family until I started counting :))

And what makes bars fun?

Liquor!
I mean, vintage paper straws in a dispenser!

Add a little bakers twine and some security envelope hearts and my "project" was complete!


Directions:

1. Purchase one acrylic straw holder from Bed Bath and Beyond.

2. Purchase paper straws from HeyYoYo on Etsy.

3. Punch 4 (two of each pattern) hearts out of security envelopes using a heart-shaped paper punch (I think it's Martha Stewart brand).

4. Cut bakers twine to desired length.

5. Using a glue stick, glue two matching hearts together, sandwiching the end of the bakers twine between them.

6. Repeat with other hearts.

7. Tie around straw holder, securing with a tiny drop of Elmer's glue at the knot - if you use a tiny dot, at the knot, in a glue that dries clear, no one will ever see it and it will keep the string from falling down.

8. Place on bar and let guests enjoy their drinks!


Blog Widget by LinkWithin

ShareThis