Search Results

Showing posts with label cookies. Show all posts

Sunday, April 10, 2011

Super Brownies

I'm about to share with you my hands-down, super favorite, super fudgy, super dark, shhhh...super secret brownie recipe. There are actually a couple secrets to this...things that will make these the brownies of your dreams...things that will make all your chocolate recipes better...things that you'll "forget" to tell people when they ask for the recipe :). 

Ok, maybe I'm exaggerating...a little.

Super Brownies

These are very moist and dense.
These are no cakey brownies.
You've been warned.

Super Brownies

So now that you're tempted...what's the secret recipe?

Super Brownies

Ingredients
(adapted from King Arthur Cookie Companion)
3/4 cup butter (1.5 sticks)
2 cups sugar
1 cup cocoa powder (I used Hershey's dark chocolate)
1 teaspoon salt
1/2 teaspoon baking powder
1 teaspoon espresso powder (that's secret #1)
1 tablespoon vanilla
3 large eggs
1 cup flour
2 ounces unsweetened chocolate (secret #2)
1 cup chocolate chips (secret #3)

Directions

  1. Buy a brownie edge pan (secret #4).
  2. Preheat oven to 325. Lightly grease said recently purchased brownie edge pan.
  3. Over low heat, melt butter. Remove from heat and add sugar. Heat again, but just slightly (not bubbling). This will dissolve more of the sugar and will give the brownies a nice shiny coat crust top. (secret #5).
  4. In a double-boiler over low heat, melt unsweetened chocolate and chocolate chips.
  5. Add cocoa, salt, baking powder, espresso powder, and vanilla to the melted butter.
  6. Whisk in eggs and melted chocolate.
  7. Add flour and stir until combined.
  8. Spoon into prepared pan.
  9. Bake 25-30 minutes or until a toothpick inserted into the center comes out clean (or with minimal crumbs). If you do use the brownie edge pan, start checking the oven at 25 mins, as it will cook faster.
  10. Remove from oven and allow to cool.

Super Brownies

It's up to you which secrets you'd like to "forget" when people ask you for the recipe.

Thursday, February 17, 2011

Cookie Stands in Action

Thanks to a little D*Sponge linkage, my DIY cookie stands are probably the most popular of my posts. So how did they turn out?

Adorable...if I do say so myself.


We also screen printed bags so people could load up on the 1,200 cookies my mom, my mother-in-law, and I made.


My cousin, taking her share.

To make the bags, I bought these (p.s. Uline is my secret weapon, they have everything) and Gocco'd a monogram that I designed in Illustrator. A round computer-printed label would work just as well if you don't want to screen print them.

And here's the cookie stand tutorial, if you missed it.


Some cookies never made it into the bags.


But a few did. :)


The reception hall was amazing, we dropped everything of a couple days before and they had the whole table set up perfectly when we arrived.


Mmmm...oreo cookie cookies.
OK so I just went to grab a link and apparently, I haven't posted this recipe yet. I'll have to get on that.


There's no real recipe for these PB cup cookies, just a couple steps: 

1. Scoop store-bought peanut butter cookie dough into a greased mini muffin tin. 
2. Bake as directed 
3. As soon as they come out of the oven, stick a mini reeses cup in the middle.
4. Curse the day that PB first met chocolate and put on your "buffet pants."


I don't even know what these are.
They might be PB-O-Cocos, but they look rounder. 
Whatever, they were gone by 10:00 anyway.


The boy loves pinwheels.
These are from that Cookie Companion book over there on the right ---------->;
(scroll up a little bit)
Not enough decadence for my taste though.
But what can you do? I'm married to him now :)

All photos by The Observatory

Sunday, January 23, 2011

Lemon-Raspberry Sugar Cookies

Just like the 10 million other people out there, January means the reintroduction of words like 
"vegetables" and "treadmill" and 
"if you don't hand over that bag of Cheetos, you're going to lose an arm." 

So far it's been going well. I've been working out, keeping track of what I eat, 
and so far I've only gained 2 pounds.

Unfortunately for someone who writes a blog called "weddings and cookies" January also means a lack of content, because it's never a good idea to have a bunch of 
warm...
delicious...
soft...
sweet...
cookies....


Oh my. How'd those get there?
Ok, I caved. Deliciously caved.

It all started with this:


I picked up this raspberry-flavored sugar at the grocery store months ago, knowing that it would be perfect as the sugar coating on lemon sugar cookies.
And it did!


I realize that I've basically made these before. Well, I've definitely made the Perfect Lemon Sugar Cookie recipe before. And I've made lemon cookies with jam. But a) never together, and b) never with raspberry sugar.

It's a good combination. Totally worth all the treadmill time I've just subjected myself to.
They're crunchy on the outside, while saying perfectly chewy and soft inside. They have a delightfully-light lemon flavor, and the raspberry sugar and jam pairs perfectly with the lemon.


So how do you make these?

Make a batch of Perfect Lemon Sugar Cookies, 
but with a couple modifications (in italics below).

The Recipe
(copied from the Crepes of Wrath blog)

2 3/4 cups all-purpose flour
1 teaspoon baking soda
1/2 teaspoon baking powder
1/2 teaspoon salt
1 cup butter, softened
1 1/2 cups white sugar
1 egg
1/2 teaspoon vanilla extract
1 1/2 teaspoons lemon extract
zest of 1 lemon
1/2 cup raspberry-flavored sugar
1 cup raspberry jam

Directions
1. Preheat the oven to 350 degrees F. Line cookie sheets with parchment paper or tin foil and spray lightly with Pam.

2. In a small bowl, stir together flour, baking soda, baking powder and salt. Set aside.

3. Rub together the zest and granulated sugar until the sugar is a pale yellow color. This helps to infuse all of the oils in the zest into the sugar and gives your cookies an even more lemony flavor. Using a mixer, beat together the butter and sugar until smooth and very fluffy (about 3-5 minutes).

4. Beat in egg, vanilla extract, and lemon extract.

5. Gradually blend in the dry ingredients and mix until just moistened.

6. Roll rounded tablespoons of dough into balls, and roll in raspberry sugar. Place on lined cookie sheets about 1 1/2 inches apart.

7. Bake about 8 minutes in the preheated oven. They should be almost done but still gooey in the middle. Using a spoon, make a small impression in the middle and add a spoonful of jam. Return cookies to over for about 3 minutes, until they're set.

8. Let stand on cookie sheet two minutes before removing to cool on wire racks. As soon as the cookies have cooled, store them in an airtight container to keep them nice and soft. Makes around 20 cookies.

And enjoy!

Sunday, September 5, 2010

Peanut Butter Oreo Cheesecake Cupcakes

...or as I like to call them...Mmmmm!


Our annual first Penn State football game/fantasy football draft party is always a call for celebration. If you've been reading this for a while, then you may remember last year's failed attempt at party snacks. Well, I'm pleased to report that this year's dessert went over much better!

wonderful friend of ours got us Martha Stewart's Cupcakes cookbook as a wedding present. And while I've been reading it at night before bed (hey, you have your fairy tales and I have mine), I had yet to make anything from the book. Determined to make up for last year, I decided that I would make the Cookies and Cream Cheesecake Cupcakes.

I had all intentions of following the recipe exactly, that is, until this happened:


Wait, what does that say?


OMPB!
For reals? Peanut butter oreos?
Yes, my friends. The legend is true. 


How'd that bite get there?

Once I discovered that they make peanut butter Oreos, I knew I had a new mission... Peanut Butter Cookies and Cream Cheesecake Cupcakes.


So aside from the peanut butter, cream cheese, and oreos, what is it makes these cupcakes so amazing?


What's that in the bottom?
Is it?
OMPB, it is!


A full Oreo at the bottom of the cupcake!
Sweet, soft cheesecake on top and a delicious cream-filled cookie at bottom.


So how do you make these?

The Recipe

42 cream-filled sandwich cookies, such as Oreos, 30 left whole, and 12 coarsely chopped
1.5 pounds cream cheese, room temperature
3/4 cup creamy peanut butter
1 cup sugar
1 tsp vanilla extract
4 large eggs, room temperature, lightly beaten
1 cup sour cream
Pinch of salt

Directions

1. Preheat oven to 275 degrees. Line standard muffin tins with paper liners. Place 1 whole cookie in the bottom of each lined cup.

2. With an electric mixer on medium high speed, beat cream cheese until smooth, scraping down sides of bowl as needed. Gradually add sugar, and beat until combined. Beat in vanilla.

3. Drizzle in eggs, a bit at a time, beating to combine and scraping down the sides of the bowl as needed. Beat in sour cream and salt. Stir in chopped cookies by hand.

4. Divide batter evenly among cookie-lined cups, filling each almost to the top. Bake, rotating pan halfway through, until filling is set, about 22 minutes. Transfer to wire racks to cool completely. Refrigerate at least 4 hours (or up to overnight). Remove from tins just before serving.


Then eat!


and enjoy some more!


Winners!

Thanks to everyone who commented to enter my giveaway for a free recipe book!


Using a random number generator...our winners are commenters:


#2 - Megan

(Megan, I couldn't find an email address/website for you, so please send an email to renee[at]myuglykitty.com with your contact info!)

#4 - Petals (which is perfect since her original comment gave me the idea)


#6 - Lu

#9 - peachyplum


and #10 - Laura!


I will be contacting you shortly!
Congrats, enjoy, and thanks to everyone who commented!

Tuesday, August 31, 2010

Recipe Book Giveaway!

After posting a quick tutorial on how to make these recipe books a week-ish ago, clever commenter Petals gave me a great idea!


I have a bunch of extras...even after my relatives all took extras home...even after I put three into my personnel collection... and even after I gave a bunch out to coworkers.

So I'm having my first giveaway!

I have five extra extra recipe books that I'm going to give out to you!

Each book comes with 25 of our favorite recipes. Some you've seen here and some you haven't. 

Just leave me a comment telling me your favorite cookie or one you've been dying to try (doesn't have to be one you saw here). 

If there are more than 5 comments :), I'll randomly choose 5 winners. 
If not, you all win!
Good luck!

Contest ends Friday (9/3) at midnight.
Winners announced Sunday!

Thursday, August 19, 2010

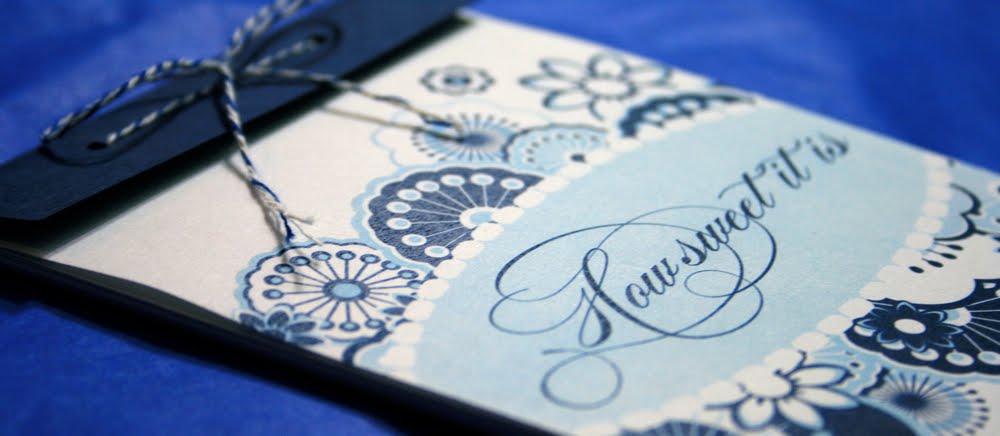
How Sweet it Is

We ended up making about 3,000 cookies for the big day. 

...Chocolate chip...
...red velvet...
...sugar...
...oatmeal...
...lemon...
...shortbread...

Well, you know, you've been reading the blog.

About a month before the wedding, I realized that if I went to a wedding with that many awesome cookies, I'd want the recipes. 

With a couple clicks of the mouse, several reams of paper, and some baker's twine, I put together these adorable recipe books for guests to take home.


Each book had 25 (I think) recipes in it, covering all our favorites.


I used Paper Source's text weight eco-white paper in 8.5x11. and printed each within a 3 7/8" by 9 1/4" area (to fit the #10 backing, also from Paper Source)

Let's try explaining that again. I used Microsoft Word and set my document to two columns each measuring 3 7/8" by 9 1/4". That way I could print two per sheet and save a little paper. I typed up all my recipes and started printing.

I designed the cover in Adobe Illustrator using clip art, but as always, you don't need any graphic design skills - draw something or collage and get it photocopied, use rubber stamps, download a free template (try i-do-it-yourself.com), or purchase one if you really feel like it's out of your league.

Once everything was printed and cut down to size. I punched two holes at the top (the #10 backing comes with holes ready). 

A little bakers twine threaded through the holes to tie it all together...and ta-da!


The guests LOVED them. People kept coming up to me and saying what a great idea it was and how they were excited to try *insert name of awesome cookie here*.


So give it a try, make it a favor, it's the gift that keeps on giving...provided your guests enjoy baking.


Monday, June 7, 2010

Dreamsicle, Creamsicle

For the most part, I'm done with the cookie testing and onto the cookie making (only 48 days to make 1,000 cookies - along with a million other things!). But with a Memorial Day BBQ to attend, I wasn't about to let a baking opportunity pass me by.

I needed something summery, light, something that went well with beer.
Enter foodgawker.com. Have you seen this website? Let's just say, don't go there if you're hungry.

As I was perusing for cookies, I saw the glowing photo of Orange Creamsicle Cookies by The Girl Who Ate Everything.


Talk about perfect for summer! Made with white chocolate and a nice orange flavor, they just taste like warm weather and relaxation!
(that's not too dramatic, is it?)

Perfectly chewy too!


Recipe

2 1/2 cups all purpose flour
3/4 teaspoon baking soda
1/2 teaspoon salt
1 cup (2 sticks) butter, softened
1/2 cup sugar
1/2 firmly packed brown sugar
1 large egg
1 teaspoon vanilla extract
2 tablespoons orange zest (I used a little more ~3 oranges)
2 cups white chocolate chips


Directions

1. Preheat oven to 375 degrees.

2. In a small bowl, combine flour, baking soda, and salt; set aside.

3. In a large bowl, cream butter and sugars until light and creamy. Beat in egg and vanilla until smooth. Gradually add flour mixture until combined. Stir in orange zest and chips.

4. Drop rounded teaspoonfuls onto ungreased cookie sheets. Do not flatten cookies; it will make them dry. Bake 8 - 10 minutes or until golden brown around edges. Do not overcook! Cookies will be plump. Cool for several minutes on cookie sheets before transferring to rack to cool completely. Store in airtight container.

I wouldn't recommend forgetting about the container and storing it open on a porch overnight, but if you don't do that they should stay nice and soft for 3 days.


Enjoy!

Wednesday, March 24, 2010

Vanilla Toffee Chippers

This might be a new fave!
(do I say that every week?)

One bite of this cookie and you'll know you recognize the flavor, but what is it?

pudding?
vanilla bean?
something...birthday-esque?

People will be guessing what complicated list of ingredients went into this fabulous chewy cookie.


The secret?
It's ridiculously easy...


The Recipe
(adapted from Once Upon a Gourmet Gin)

One (18.5 oz) box of yellow cake mix
1/2 cup vegetable oil
2 eggs
6 full-size heath bars crushed
1 tsp vanilla
~ 4 Tbsp flour (I threw in a small handful to make them less sticky)

Directions

1. Preheat oven to 350 degrees.

2. Mix cake mix, oil, eggs, vanilla, and flour in medium bowl.

3. Crush heath bars in plastic bag with mallet. Stir into batter.

4. Using a cookie dough scoop, drop dough onto cookie sheets sprayed with non-stick coating or use parchment paper about 2 inches apart.

5. Bake 9-11 minutes until edges are just starting to brown. They may look underdone in the middle, but that's OK.

6. Let cool ~10 minutes on cookie sheet before transferring to a cooling rack to cool.


Nice firm outside, wonderfully chewy inside, and tastes kinda like birthday cake - go cake mix! The chocolate toffee bits add a wonderful buttery crunch, and well chocolate never hurts.

Enjoy!

Thursday, March 11, 2010

World Peace Cookies

I wish I could come up with a more clever title, but if you've ready a cookie/cooking blog in the last year, then you'd know that all the clever, pun-tastic titles for Dorie Greenspan's World Peace Cookie have already been taken.


I also wish that the sun wouldn't set before I get home from work so I could take some natural-light photos, but alas, we'll have to settle for adjusted, low-light photography (because I refuse to use the flash).


After reading blog post after blog post and drooling over foodgawker photos, I was actually a little reluctant. I mean, can a cookie this talked-up really deliver?

Well, for someone who thinks cookies should be chewy, soft, and gooey, this little sandy chocolate nugget was rather addictive.

They definitely needed a day to rest. The one(s) I tried right out of the oven crumbled at the first bite, but the next day, these had firmed up delightfully leaving a chocolate-y pleasant (not overpowering) cookie. Well done bloggers, well done.


Recipe
(from Dorie Greenspan but I actually used the recipe from Smitten Kitchen to make the cookies - I'm assuming they're the same)

1 1/4 cups all-purpose flour
1/3 cup unsweetened cocoa powder
1/2 teaspoon baking soda
1 stick plus 3 tablespoons (11 tablespoons) unsalted butter, at room temperature
2/3 cup (packed) light brown sugar
1/4 cup sugar
1/2 teaspoon fleur de sel or 1/4 teaspoon fine sea salt
1 teaspoon vanilla extract
5 ounces bittersweet chocolate, chopped into chips, or a generous 3/4 cup store-bought mini chocolate chips

Directions

1. Sift the flour, cocoa and baking soda together.

2. Beat the butter on medium speed until soft and creamy. Add both sugars, the salt and vanilla extract and beat for 2 minutes more.

3. Turn off mixer, pour in the flour, drape a kitchen towel over the stand mixer to protect yourself and your kitchen from flying flour and pulse the mixer at low speed about 5 times, a second or two each time. Take a peek — if there is still a lot of flour on the surface of the dough, pulse a couple of times more; if not, remove the towel.

4. Continuing at low speed, mix for about 30 seconds more, just until the flour disappears into the dough — for the best texture, work the dough as little as possible once the flour is added, and don’t be concerned if the dough looks a little crumbly. Toss in the chocolate pieces and mix only to incorporate.

5. Turn the dough out onto a work surface, gather it together and divide it in half. Working with one half at a time, shape the dough into logs that are 1 1/2 inches in diameter. Wrap the logs in plastic wrap and refrigerate them for at least 3 hours.

6. Getting ready to bake: Center a rack in the oven and preheat the oven to 325°F. Line two baking sheets with parchment or silicone mats.

7. Working with a sharp thin knife, slice the logs into rounds that are 1/2 inch thick. (The rounds are likely to crack as you’re cutting them — don’t be concerned, just squeeze the bits back onto each cookie.) Arrange the rounds on the baking sheets, leaving about one inch between them.

8. Bake the cookies one sheet at a time for 12 minutes — they won’t look done, nor will they be firm, but that’s just the way they should be. Transfer the baking sheet to a cooling rack and let the cookies rest until they are only just warm, at which point you can serve them or let them reach room temperature.

For me, the dough was really crumbly and I was sure I did something wrong. But I just kept pushing it together (when making the log and cutting them into discs) and everything turned out just fine!

Blog Widget by LinkWithin

ShareThis