Search Results

Showing posts with label diy. Show all posts

Sunday, April 3, 2011

Corina's Cute Wedding

Last week, Corina emailed me some adorable photos from her DIY wedding. 


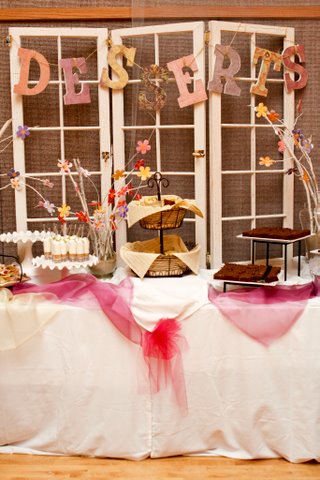
She handmade all her centerpieces from branches and paper flowers (just like yours truly)


I love how she used so many bright colors. Everything looks so fresh and festive!


I also love how she used them to decorate her dessert table!


Great job Corina and congrats!!

All photos by Jessie Pyne
(UPDATE: Jessie emailed me with a link - check her out!)

Thursday, February 17, 2011

Cookie Stands in Action

Thanks to a little D*Sponge linkage, my DIY cookie stands are probably the most popular of my posts. So how did they turn out?

Adorable...if I do say so myself.


We also screen printed bags so people could load up on the 1,200 cookies my mom, my mother-in-law, and I made.


My cousin, taking her share.

To make the bags, I bought these (p.s. Uline is my secret weapon, they have everything) and Gocco'd a monogram that I designed in Illustrator. A round computer-printed label would work just as well if you don't want to screen print them.

And here's the cookie stand tutorial, if you missed it.


Some cookies never made it into the bags.


But a few did. :)


The reception hall was amazing, we dropped everything of a couple days before and they had the whole table set up perfectly when we arrived.


Mmmm...oreo cookie cookies.
OK so I just went to grab a link and apparently, I haven't posted this recipe yet. I'll have to get on that.


There's no real recipe for these PB cup cookies, just a couple steps: 

1. Scoop store-bought peanut butter cookie dough into a greased mini muffin tin. 
2. Bake as directed 
3. As soon as they come out of the oven, stick a mini reeses cup in the middle.
4. Curse the day that PB first met chocolate and put on your "buffet pants."


I don't even know what these are.
They might be PB-O-Cocos, but they look rounder. 
Whatever, they were gone by 10:00 anyway.


The boy loves pinwheels.
These are from that Cookie Companion book over there on the right ---------->;
(scroll up a little bit)
Not enough decadence for my taste though.
But what can you do? I'm married to him now :)

All photos by The Observatory

Saturday, January 29, 2011

Our Wedding Tree

One of the things I had the hardest time trying to figure out was the guestbook. It wasn't that I didn't have any ideas... it's that I had too many. We eventually decided to go with a wedding tree.

(photo credit Jonas Peterson)

But I didn't think people would want to dirty-up their fingers, so I had another idea!

(photo credit The Observatory)


We made a poster, cut out a bunch of leaves, and asked people to "leaf" us a note! 


(photo credit The Observatory)

It was a big hit!

(photo credit The Observatory)

And now it's framed in our living room.


So how'd we do it?
Pretty simple really.

I purchased some clip art from istockphoto.com
Created a 24"-36"-sized document in Adobe Illustrator and added some text.
(fonts used: BlairMdITC TT Medium and Burgess Script)
Took the file to Staples and had it printed on a poster.
(I think it was about $25)

Then I picked up a pack of cardstock in various shades of blue and cut out leaves. No pattern, just freehand. I added a small piece of double-stick tape to the back of each. I made sure to use those little scrapbook tape squares so that the tape wouldn't be exposed, but would have a little tab of paper that guests could pull off when they were ready to add their leaf to the poster.

The venue had an easel and put the poster up outside the reception hall and set up a table with the leaves and various blue markers.

And all our guests started writing sweet notes!


See the big "I love you"? That's from my husband's cousin (aka the little boy in the photo above). Too cute!

However, the best one is from Jay's Grandma/our friend "Kennedy." 
I guess that, because his signature was so light, she didn't see it.


Bless your heart, Grandma. :)

Thursday, July 22, 2010

This weekend!

Bouquet, originally uploaded by UglyKitty.

Can you tell things are getting busy around here? All my staged, nice photos with my fancy camera have been replaced by quick iPhone shots.

Well, it's this weekend!!!!!

Would you believe there is only two things left on my to-do list: manicure/pedicure and pack for the honeymoon...and I've got my nail appointment in 1 hr 15 mins.

After the wedding, I'll take the time to post all the details and lots of tutorials, but for now, there here are the bouquets.


Each one was made from recycled paper (security envelopes), wire, floral tape, tacky glue, and ribbon.

Total cost per bouquet: ~$3

My favorite though is the ribbon-wrapped handle. My maid of honor and I played with them for about an hour trying to figure out how to wrap them to no avail. Then I channeled my inner little girl, and started tying knots in the ribbon friendship-bracelet style. The ribbon held perfectly and it gave the wraps a great staircase effect.


I'll be back in a few weeks....as the Mrs.!

Wednesday, July 14, 2010

Cutest topper ever

What's better than having wedding presents on your doorstep when you arrive home from work?

Having freaking adorable cake toppers lovingly made by your fabulously-creative aunt waiting on your doorstep when you arrive home from work.

That's what.


Also seen on the ilovetocreate blog.

Friday, July 9, 2010

Drink it up!

I know you've seen this idea before, but since I'm insane, I wanted to add another DIY project to our wedding.

We're putting together welcome tote bags for our guests and, since it will be a nice, hot, summer day, we thought it would be a good idea to give them some water (customized of course).


All it took was some leftover belly bands from our invitations and a membership to Sam's Club.


Just recruit a craft-reluctant fiance, have him remove the existing labels, add a little double stick tape, and wrap the belly band around the bottle.


Done!

Then find a place to store tons of water bottles until you've finished screenprinting the tote bags and can convince your fiance that it's his job to stuff them with goodies.


Tuesday, June 8, 2010

Centerpiece of my Heart

I apologize for the crappy iPhone photos, but the wedding stuff is at my parent's house and my camera is at mine. Plus this way it doesn't give too much away.

We have officially (and by we, I mean my incredible Mom) started making the centerpieces! We've 1/4 of the way done!


While giant floral arrangements in vases are beautiful, they are way out of my price range. Plus, I'd rather go a greener, DIY route.
So what's the damage?
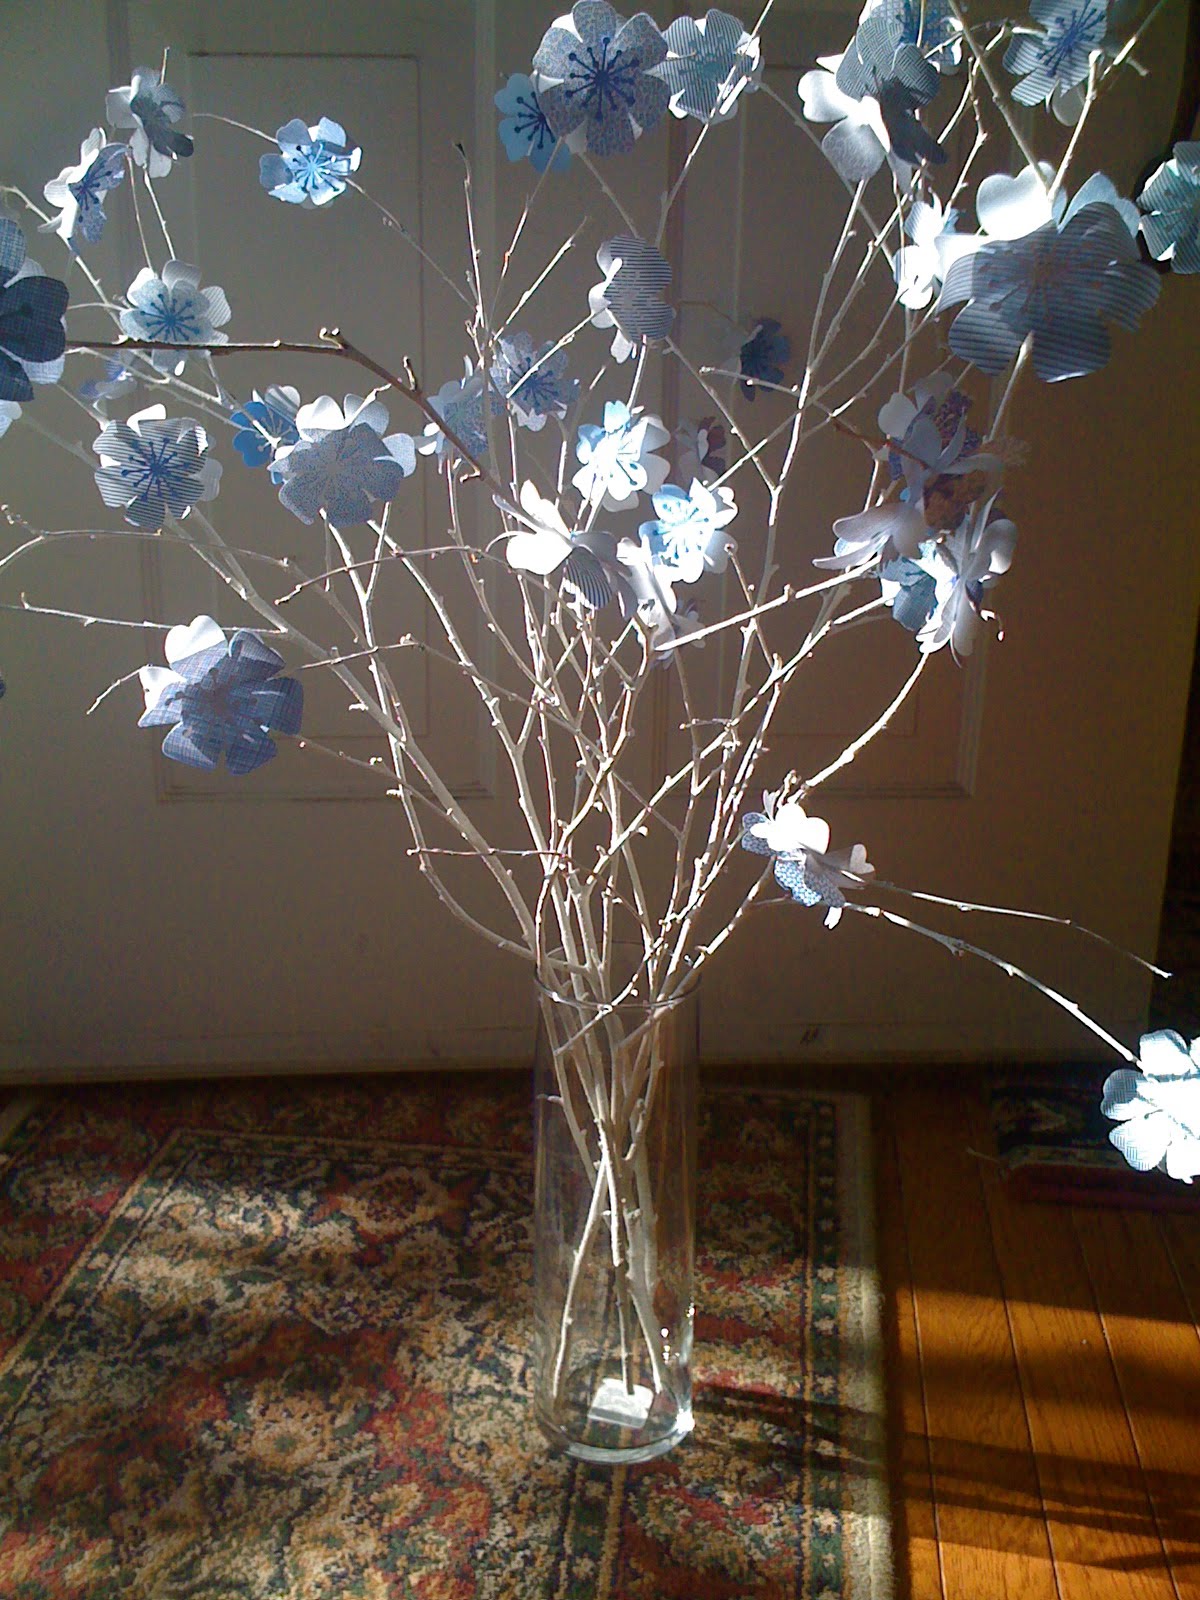
Total cost per centerpiece: about $4!


How'd we do it?

Flower punch purchased at Michaels: $11.99 (after 40% off coupon)
$11.99/25 vases = $0.50 per vase

Starburst punch purchased at Michaels: $10.79 (after 40% of coupon)
$10.79/25 vases = $0.43 per vase

10" glass cylinder vase (I waited for a sale at Michaels): $2.50 each

Glue sticks: already had, but probably about $0.10 per vase

Paper for flowers: Recycled security envelopes - Free! (unless you count all the bills I had to pay to get the envelopes)

Sticks from out yard - Free!
Paint for sticks - Free! (the previous owner's of our house left a 1-gallon can of white paint)

Rice (to weight the bottom): Estimate of $0.02 per vase.

Another $0.10 thrown in for something I'm sure I forgot.

Total cost per centerpiece: $3.65!


All you need is the above materials, lots of time, and a slight mental disorder that forces you to handmake everything under the sun.

Directions

1. Punch flowers using the large flower punch.

2. Punch flower centers using the starburst punch.

3. Using a butter knife, bone folder, or finger, gently curl the edges of the flowers.

4. Glue the starburst to the larger flowers. I used a glue stick.

5. Gather a LOT of branches after storms and let them dry on your front porch.

6. Paint branches with white, latex paint and let dry.

7. Take two flowers, add a little hot glue to the back of one, and pinch a branch between the two flowers. That way you have one on each side of the branch, but only have to glue once.

8. Repeat until you have enough to cover all your tables!


Monday, May 24, 2010

And they're off!

It's official,
no turning back now,
no more spell checking,
no more fact checking...

the invitations are sent!
Makes me a little nauseous to be honest.


I have to say, I really love how they came out.
(you'll have to click on it for the full size)
(and I'll take photos when I'm home during daylight again)

If you see a typo - other than the one on the small info card, I caught that one - don't let me know.


As for the boring technical info: I designed it in Adobe Illustrator with purchased clip art. Used my laser printer and printed on Paper Source cardstock (eco white, bluebell, and navy). Then I used this trick to hand-addresses the envelopes.


The stamps are my favorite part though!


I spent a couple weeks (ok, maybe months) searching ebay for american, off-paper, unused, blue, stamps and bought up everything I could find. For the record, the older the stamp, the worst it tastes. I'm very happy the USPS decided to make self-adhesive stamps.

It was so hard saying goodbye to my precious invitations. It makes everything so real. Not in the sense that I'm scared to get married, but what if I put the wrong time? or date? or is says "Remee"? what if the automatic letter sorting machine eats my entire set for brunch? or the hotel phone number is wrong and it turns out to be an adult entertainment number instead?

(that last one actually happened to my friend - luckily they have a good sense of humor)

Well, at least I was able to take care of hungry letter sorting beast fear. The nice people at the USPS let me hand-cancel each one. So they wouldn't have to force fed through the sorter.

They went out Thursday and we even got our first RSVP back today!

So exciting!!

Wednesday, April 7, 2010

You Guest it!

I figured out my guest book conundrum!
Did you know I had a guest book conundrum?
How do you spell "conundrum"?

Well, I LOVED the idea of a tree with finger prints


...but people may not be willing to dirty their gussied-up fingers.

So I paced and thought and thought some more...
and flipped through photos
...and searched blogs
but nothing seemed to appeal to me as much as the tree guest book.

Until I stumbled on this photo from Made by BeaG

(photo credit Made by BeaG)

Then it hit me!
(duh!)

Cut out a bunch of leaves, add a little double-stick tape square on back.
Then let people write messages on the leaves and stick them onto a large tree print.

The idea is just forming, but once I actually have something made, I'll post a follow-up.
Yea!

Thursday, April 1, 2010

Hair Trial

Last Friday I had a day off and decided to make an appointment to do my wedding hair trial run. I had a long week of field work the week before and it was so nice to just sit back and let the fabulous people at my favorite little salon in Annapolis do my hair.

I brought some of my favorite styles and my DIY flower and let them do their magic.

Now, it's killing me to not post every photo and every idea and every little thing I'm planning, but I guess I've got to keep some things a surprise.

So having said that, here's a little "sneak peak" of what we came up with.


The flower is perfect and I'm pretty sure Carrie would be proud.

Sunday, February 21, 2010

DIY Calligraphy - Addressing Envelopes

For someone who's so fabulously artistic, I have terrible handwriting. Not only do I have terrible handwriting, I make typos. I didn't even know you could make typos while handwriting, but I miss letters or they run together all the time. It's not that I don't know how to spell the word (usually), but someone that doesn't translate on paper very well. And, even when I get the words spelled correctly, I'm lucky if anyone else can interpret them.

So, when it came to my wedding invitation envelopes, I was left with a dilemma. What was the best way to address them? I figured I had a couple options:

1. Be traditional and handwrite the addresses, drop them off at the post office, and, like a mother dropping her kids off at school for the first time, wave at my little darlings, cry softly, and whisper, "Godspeed little doodles" in the hopes that the post office would be able to read my chicken scratch.

2. Buy labels and *gasp* computer print them. Well that might work, just don't tell grandma.

3. Pay a calligrapher to write each one with a gorgeous sweeping, elegant, style that I can only dream of...Hmm...let's see. $2.00 x 150 invitations = how much were labels again?

4. Run the envelopes through my computer printer! Oh wait, the haste of a 20% Paper Source sale, I already purchased 200 A7 envelopes in "night." And, unless HP has come out with the best printer since sliced bread (i.e., can print light ink on dark paper), that's not going to work.

What's a DIY-er to do?
and then...I found the solution!

Look, I did these myself!

Was it calligraphy class?
Bribing a relative with good handwriting?
Surgically transplanting my hand with Laura Hooper?

Nope!
It was...Wedding Bee and the AMAZINGLY clever Jennifer.

Ok, here's the secret: tracing (shhh...don't tell)

Start by computer printing the address in a color similar to the color or your envelope.

Can you see that?
What about this one?


It is hard to see, but with the right light, and some patience, it's not so bad.

Templates and printer settings will vary from computer/printer to computer/printer, but I can tell you that I used Adobe Illustrator to make sure everything was lined up correctly, changed my printer settings to "5.25 x 7.25" and "envelope" and just ran them through one at a time. I did have to copy/paste each address into Illustrator, but I got into a rhythm and it went pretty quickly. (Plus, I've computer-printed addresses for wedding invitation clients in the past, so I'm kind of use to it by now).

Then I used a Uni-Ball Singo broad white gel pen and just traced! The ink wasn't perfect, and I had to trace a few lines over as I wrote, but overall, I think the one's I've completed came out gorgeous!


They have a wonderful handmade quality, but I didn't have to pay a lot or risk people knowing what my actual handwriting looks like.

A couple vintage stamps to complete the look... and ta-da!

So I still have a lot more to do, but at least it's progress, right?

Friday, January 15, 2010

Best Guestbook Yet!

I ran across this idea for a guestbook today that was so incredibly adorable and sweet that I felt compelled to share it right away. . .
a wedding tree!

Set up a large image of tree branches and ask guests to leave thumprint "leaves" and sign their names. That's it! So beautifully simple.

Wouldn't this be a beautiful poster to hang up in your home?

Logistically-thinking, I would probably have blue ink pads and some baby wipes to allow guests to clean their hands after they "leaf" their mark. :)

Photo credits: Paul and Cassies wedding, photographed by Jonas Peterson


Blog Widget by LinkWithin

ShareThis